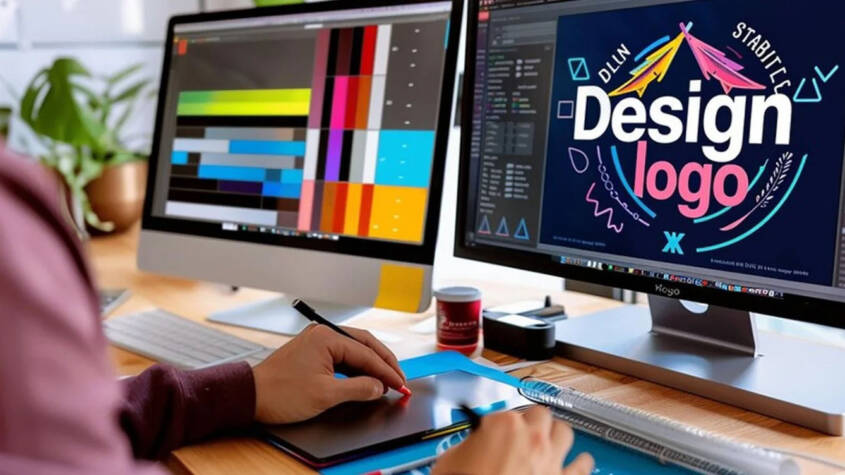
So, you have an amazing design and you want to see it stitched out on a cap or a tote bag. You quickly discover your embroidery machine doesn’t read JPEGs or PNGs—it needs a specialized file format like PES, DST, or EXP. Hiring a professional can cost $10-$30 per design, and as a hobbyist or someone just testing the waters, that can add up fast. This leads to the burning question: is it possible to Digitize XXX Embroidery Files for Free? The short answer is yes, but with major caveats. This guide will walk you through the truly free options, the step-by-step processes, and the crucial realities you need to understand before you thread your needle.
The Essential Truth: “Free” vs. “Professional”
First, let’s set a vital expectation. The process of creating an embroidery file is called digitizing, and it’s a skilled craft blending art and engineering. Professional digitizing software can cost thousands of dollars for a reason. It offers precise control over every stitch, pull compensation, underlay, and density—factors that make the difference between a puckered mess and a polished design.
Free methods typically offer “auto-digitizing” or very basic manual tools. Think of it like this: using a free tool is like using a basic paint program, while professional digitizing is like using full Photoshop with a drawing tablet. You can create something with the former, but it lacks the precision and control of the latter. Your goal with free tools should be to create simple, low-stakes designs for personal use and learning.
Method 1: Using Free Auto-Digitizing Websites
This is the fastest “free” method. You upload an image, the website’s algorithm traces it and attempts to create stitch areas, and you download a file.
The Process:
-
Find a reputable free platform like
inkstitch.org(which has an online auto-route tool) orembroiderydesigns.com(which often has free conversion tools). -
Upload a clean, high-contrast image. Simple logos with bold lines and limited colors work best.
-
Adjust basic settings if available, like expected size and number of colors.
-
Process the image and download the generated file (often in a format like PES or DST).
The Reality Check:
-
Pros: Incredibly fast (minutes), completely free, no software to install.
-
Cons: Algorithmic results are often poor. The software doesn’t understand fabric, leading to no underlay, inappropriate stitch types, and inefficient stitch paths. Complex designs will fail. Use this only for the simplest clip-art style images and expect to do test sew-outs on scrap fabric.
Method 2: Free, Open-Source Software: Ink/Stitch
This is the most powerful truly free option and an excellent beginner learning tool. Ink/Stitch is an extension for the free, open-source vector graphics program Inkscape. This method gives you manual control, which is far superior to auto-digitizing websites.
Step-by-Step Beginner Workflow:
-
Install the Tools:
-
Download and install Inkscape (free from inkscape.org).
-
Then, install the Ink/Stitch extension (detailed instructions are on the Ink/Stitch website).
-
-
Prepare Your Art in Inkscape:
-
Import or trace your design to create clean vector paths. Each color in your design should be its own vector shape.
-
Simplify! Remove tiny details that won’t stitch well.
-
-
Apply Stitch Settings with Ink/Stitch:
-
Select a vector shape. Go to the
Extensionsmenu >Ink/Stitch>Params. -
Here, you assign stitch types. Use “Fill” for large areas, “Satin Column” for borders and text, and “Running Stitch” for fine details.
-
You can adjust basic settings like stitch length and density. For fills, a density between 0.30mm and 0.45mm is a good starting point.
-
-
Generate and Export Your File:
-
Once all objects have stitch types assigned, go to
Extensions>Ink/Stitch>Embroider. -
A preview will generate. You can visualize the stitch order.
-
Export to your machine’s format (PES, JEF, DST, etc.).
-
Why This Method is Better:
You learn the core concepts of digitizing by manually assigning stitch types. It forces you to think about how a design is built. However, it still lacks the advanced automation and precision engineering (like dynamic pull compensation and sophisticated underlay) of professional tools.
Method 3: Free Trials of Professional Software
This is a “free for now” method that gives you a taste of professional results.
-
Wilcom Hatch: The industry leader offers a 30-day free trial of their Hatch software. This is not a limited version; it’s the full, powerful program. This is your best chance to use near-industrial-grade tools for free.
-
Embrid: Often has a 30-day trial period for their digitizing modules.
How to Use This Wisely:
-
Plan your digitizing projects for a single month.
-
Use tutorial videos (YouTube has many for Hatch) to learn the basics quickly.
-
Digitize everything you can during the trial period and save the final stitch files. The trial may stop you from creating new files after it expires, but you can usually still export and use the files you created during the trial.
The Critical Step: Testing and Troubleshooting
No matter which free method you use, never stitch your first try on your final project. Testing is non-negotiable.
-
Stitch It Out on Scrap Fabric: Use the same fabric and stabilizer you plan to use for the final item.
-
Analyze the Problems: Is it puckering? You likely need underlay (hard to add in free tools) or less density. Are the stitches loose? Increase density. Are details blurry? The design may be too small or complex for the method you used.
-
Iterate: Go back to your software, make adjustments, and test again. This iterative process is how you learn.
What You Simply Cannot Expect from Free Tools
Managing your expectations is key to avoiding frustration:
-
Photorealistic Designs: Free tools cannot intelligently convert photos or complex gradients.
-
Small, Detailed Text: Lettering under 0.5 inches tall will almost always be unreadable without professional techniques.
-
Guaranteed Sew-Perfection: Files will often require manual tension adjustment and machine fiddling.
-
Optimization for Specialty Fabrics: Digitizing for stretchy knits, towels, or caps requires specific adjustments that free tools generally don’t handle well.
Conclusion: Start Free, Learn, and Know When to Upgrade
The journey to Digitize XXX Embroidery Files for Free is absolutely possible for a beginner. It’s a fantastic, low-risk way to dive into the concepts of digitizing and create simple, personal projects. Start with the Ink/Stitch method—it teaches you the most. Use free trials to experience professional power.
Ultimately, view free digitizing as a learning platform, not a production solution. The time and material you might waste on failed complex designs will often outweigh the cost of a professional service. As your projects grow in importance or complexity, investing in professional software or services becomes the logical, cost-effective next step. But for your first steps into turning your ideas into thread, the free tools are waiting—just thread your needle with a dose of patience and realistic expectations.
Who Decides Warr Hoodie Style Guide for Beginners
The Warr hoodie sits in a special place within urban design culture. Its design comes from…
A Full-Service Print Shop Specializing in Digital and Offset Printing
Printing looks simple—until it isn’t. Anyone who has rushed to a print shop near …

